If you are looking for a holding force that round magnets simply cannot provide, neodymium bar magnets are the ultimate upgrade. These rectangular powerhouses offer a long, flat magnetic field that excels at linear holding, alignment, and heavy-duty mounting. In this article, we will explore what makes these magnets special and how you can harness their incredible strength safely and effectively.
What is Neodymium Bar Magnets
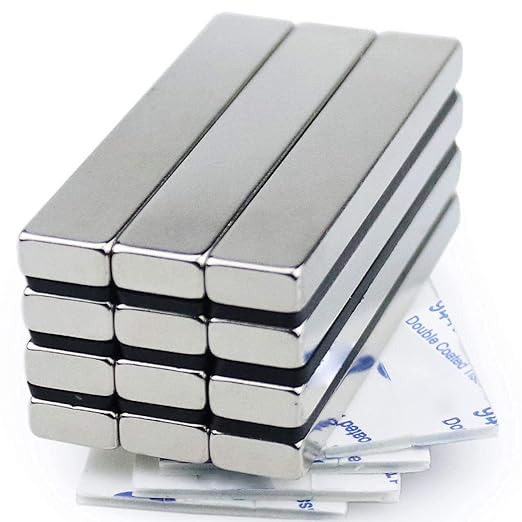
Neodymium bar magnets are rectangular blocks made from an alloy of neodymium, iron, and boron (NdFeB). Unlike cylindrical magnets, their elongated shape creates a magnetic field that is concentrated along the flat faces rather than a single point. This makes them part of the rare earth magnet family, meaning they are significantly stronger than traditional ferrite or ceramic magnets of the same size. The standard coating is a shiny nickel-copper-nickel triple layer, which protects the brittle inner material from corrosion and chipping. Because of their shape, neodymium magnets provide incredible stability against sliding forces, making them perfect for door catches, tool holders, and jigs.
The key difference between a bar magnet and a disc lies in the contact area. A bar magnet spreads its pull force across a wider surface, making it much harder to shear or slide off than a round magnet. This is why industrial engineers often prefer neodymium bar magnets for applications where vibration is constant.
3 Specifications You Must Know
To buy the right bar magnets, you need to look past the length and width. These three technical specs will determine if your project succeeds or fails miserably.
1. Magnetization Direction (Anisotropic Orientation)
This is the most confusing spec for beginners but the most critical. Neodymium magnets are almost always anisotropic, meaning they have a specific magnetic direction. You must check if the magnet is magnetized “through the thickness” or “through the length.” If a bar is 50mm long, 10mm wide, and 5mm thick, a magnetized thickness means the 5mm faces (the large flat top and bottom) are the North and South poles. If magnetized through the length, the tiny ends are the poles. Most bar magnets are magnetized through the thickness to maximize holding force. Always read the product arrow diagram.
2. Grade (The “N” Number)
Just like other rare earth magnets, neodymium magnets come in grades ranging from N35 to N52. An N52 grade is the strongest available but is also the most brittle and expensive. For a bar magnet, brittleness is a huge concern because the rectangular shape has sharp corners that chip easily. If you drop an N52 bar magnet, it is very likely to crack. For shop use, an N42 grade offers the best balance of incredible power and structural durability.
3. Operating Temperature (Max Working Heat)
Standard neodymium magnets will permanently lose magnetic strength if you heat them above 80°C (176°F). If you are embedding these magnets into wood using epoxy that requires heat curing, or if you are using them near an engine, standard N-grade magnets will fail. You need to look for high-temperature ratings like “M” (up to 100°C) or “H” (up to 120°C). Never assume you can weld near them or use them as solder helpers unless they are rated specifically for high heat.
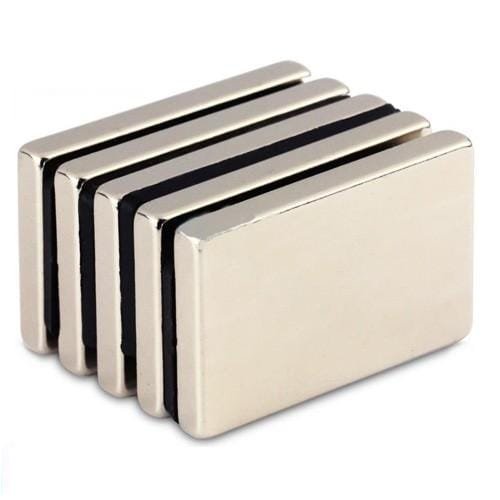
How to Produce It: Creating a Magnetic Tool Holder Strip
While we cannot literally manufacture neodymium bar magnets at home without industrial powder metallurgy equipment, you can “produce” a functional product using them. Here is a step-by-step guide to making a heavy-duty wall-mounted tool holder using raw neodymium magnets and a wooden plank.
Step 1: Source Uncoated or Bare Wood
Select a hardwood strip like oak or maple that is at least ¾ inch thick. Softwoods like pine might crack under the intense magnetic force. The wood acts as a cover to prevent the brittle magnets from shattering against your tools.
Step 2: Route Pockets for the Magnets
Measure your neodymium magnets precisely. Use a plunge router to cut shallow pockets into the back of the wood. The pocket depth must be exactly 0.5mm shallower than the magnet’s thickness so the magnet sits slightly proud. The width and length of the pocket should be 1mm larger than the magnet. This gives room for glue and wood expansion. The solid front face of the plank remains untouched. This way, tools will stick to the front face, and the magnets pull through the thin wood barrier.
Step 3: Protect and Seat the Magnets
Before placing the magnets, cover the back of the routed pocket with a thin layer of fiberglass mesh tape. This adds tensile strength and prevents the wood from splitting. Do not let the bare neodymium bar magnets snap into the pocket from a distance; they will break. Place them in gently by hand.
Step 4: Secure with Slow-Cure Epoxy
Regular super glue is too brittle for this dynamic load. Mix a two-part, slow-cure epoxy. Push the epoxy into the pocket, place the magnet in, and press firmly. The magnet will try to jump out if you have multiple pockets next to each other. Use a non-magnetic plastic clamp or heavy weights to hold everything flat while the epoxy cures for 24 hours. Ensure the polarity is all aligned the same way if you are making a long strip; otherwise, the magnets will fight each other.
Step 5: Mount and Test
Screw the wooden strip to the wall using countersunk screws through the wood, avoiding the magnet pockets. Stick your wrenches, screwdrivers, and pliers to the front. The wood protects the neodymium bar magnets from direct impact while allowing a strong magnetic field to pass through.
The Relationship Between Bar Magnets and Halbach Arrays
To truly understand the potential of neodymium bar magnets, you need to know about the Halbach array. This is an arrangement of multiple bar magnets in a specific pattern that amplifies the magnetic field on one side while nearly canceling it on the other. You stack a bar with the North pole pointing sideways, then a bar pointing up, then a bar pointing the other sideways.
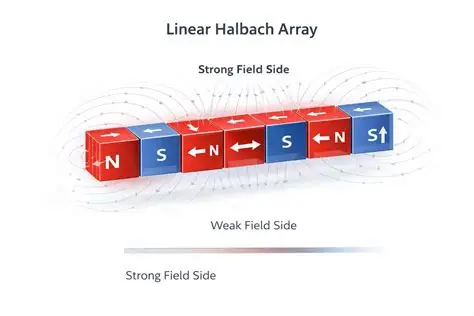
By assembling neodymium bar magnets into a Halbach array, you can create a magnetic strip that is incredibly strong on the front but has virtually no sticky magnetic field on the back. This is revolutionary for items attached to sensitive electronics or steel walls where you don’t want the back to waste energy. Experimenting with cheap bar magnets to build a Halbach array is a fantastic physics project that demonstrates field manipulation without any electricity. It shows that the shape of neodymium bar magnets makes them uniquely suited for directional magnetic engineering, unlike simple round discs.
Understanding Magnetization Directions in Neodymium Bar Magnets
Neodymium bar magnets are not all magnetized the same way, and this is where many buyers run into trouble. Two bars with identical dimensions can behave completely differently depending on which faces carry the poles.
The most common configuration is magnetization through thickness. Picture a bar that measures 50 millimeters long, 10 millimeters wide, and 5 millimeters thick. When magnetized through thickness, the two large 50 by 10 faces become the north and south poles. This gives maximum surface area for holding against a flat steel plate, so it is the standard choice for mounting, catches, and holding applications.
Magnetization through length places the poles on the two small end faces. The field extends further along the bar’s axis, which suits sensor work, reed switches, and applications where the magnet approaches a target end-on. Holding force against a flat plate is much lower in this orientation, so it is a poor choice for mounting.
Magnetization through width puts the poles on the two long narrow edges. This is less common, but it appears in some specialty applications where space constraints dictate the approach direction.
Multi-pole bars are a fourth option. Instead of a single north and south pole, the surface is magnetized with alternating poles along its length. These are used in magnetic encoders and some linear sensor designs. The pole pitch, meaning the distance between pole centers, must match the sensor’s requirements exactly.
Before ordering, confirm the magnetization direction in writing and ask for a diagram. Suppliers sometimes default to through-thickness when the customer intended something else, and the resulting magnets cannot be corrected after production. This one detail prevents a large share of ordering mistakes with neodymium bar magnets.
Common Applications for Neodymium Bar Magnets in Industry
Neodymium bar magnets appear in more industrial settings than most people realize. Their rectangular shape gives them advantages that round magnets cannot match, particularly where linear holding or alignment matters.
Magnetic clamping and workholding is a major use. Machine shops place bar magnets in fixtures to hold steel workpieces during light machining, inspection, or assembly. The flat faces provide stable contact and resist the sliding forces that round magnets handle poorly. Bars can also be arranged in rows to create a larger holding surface across a fixture bed.
Magnetic separators use banks of neodymium bar magnets to pull ferrous contamination from material streams. Food processing lines, plastic recycling plants, and powder handling systems all rely on this approach. The bars are mounted inside a housing or across a chute, and the magnetic field captures tramp metal before it reaches downstream equipment or ends up in finished product.
Door catches and cabinet latches are a simpler but extremely common application. A bar magnet mounted on the frame and a steel strike plate on the door produce a reliable, quiet closure. Because the bar is elongated, it resists twisting better than a single disc magnet, which keeps the door aligned over time.
Sensor and switch applications use bar magnets in reed switches, proximity sensors, and position indicators. The elongated field allows the sensor to trigger reliably across a larger travel distance than a small disc would provide.
Retail and display work also relies on bar magnets. They hold signage, shelf dividers, and product displays in place without visible fasteners. The flat profile hides easily behind panels and labels.
Tool organization rounds out the list. Bars mounted on workshop walls hold wrenches, files, and small parts securely while keeping them visible and within reach.
FAQ: Your Neodymium Bar Magnets Questions Answered
1. Can I cut a neodymium bar magnet to make it smaller?
No, you should never attempt to cut or drill into neodymium bar magnets. They are not flexible metal; they are a sintered powder compact. If you try to saw through one, it will crumble, spark, and potentially catch fire due to the flammable particles. The heat from cutting instantly demagnetizes the material. Always buy the exact size you need for your project rather than trying to modify an existing magnet.
2. Why do my bar magnets hold well flat but slide off when vertical?
This is the difference between pull force and shear force. Neodymium bar magnets have an immense pull straight down, but their sheer resistance depends on friction. The nickel coating is quite smooth. If you hang a heavy tool vertically, the magnet may hold it magnetically, but the smooth metal slides down. The solution is to create a “stop” ledge under the tool or to recess the magnet so the tool physically rests on a shelf while the magnet just keeps it pinned backward.
3. How do I separate two large neodymium bar magnets stuck together?
Never try to pull two strong neodymium bar magnets directly apart with your fingers; this is how serious pinch injuries happen. Keep them flat on the edge of a sturdy table. Slide the top magnet sideways until it hangs over the edge. Then, gripping the base magnet with both hands, push the overhanging magnet down and away, shearing them apart. For extremely strong bars, use a non-magnetic plastic wedge to split them gradually.
Conclusion
Neodymium bar magnets offer a level of directional holding power that makes them indispensable for the organized workshop. By understanding their magnetization direction, respecting their brittle nature, and using the right mounting techniques like embedded wood strips, you unlock a safe and high-performance storage solution. Whether you are building a hidden knife rack or experimenting with a Halbach array, remember to always handle these strong magnets with caution. Start with a medium-grade N42 set of neodymium bar magnets, and you will quickly find they outperform any magnetic tool holder available at the hardware store.
7 Powerful Reasons to Choose Small Neodymium Magnets for Your Next Project